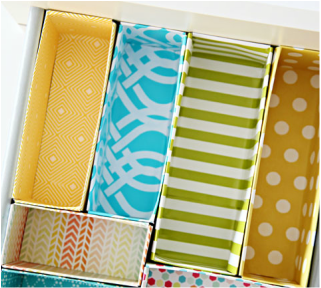
A little picture for inspiration to start:
Anyways, the supplies you will need are: ruler, tape, boxcutter, scissors, a few cereal or granola bar boxes, and decorative paper or wrapping paper (you may need multiple pieces of paper if using decorative paper, wrapping probably works better)
 |  |
Let's get DIYing! Start by putting the boxes in the drawer you are organizing (see above), and putting a mark a little tiny millimeter or two below the top of the drawer on all sides of the box (see below). You can turn the box as you go to make it easier.

Next, using the boxcutter, cut along the lines you drew.

Cut a thin, long strip of decorative paper that will fit along the inside bottom, inside short sides, and outside short sides (see below). If you fall short, you can always tape another strip to the end of the existing one. Try the strip out for sides, the tape it down anywhere and any way necessary. A pencil eraser is a handy tool for pushing the paper down into the bottom and creases.

Next, repeat the procedure above, but for the long sides. Cut a thicker piece of paper, or don't cut it at all. Chances are you will run short if you are not using wrapping paper, so tape a sheet (or two) on to the end of the first one. If you are worried about appearance, just put the taped side on the inside, so that all that is showing is a little crack here and there.

Voila! You can now fill your drawer dividers with stuff! If you want, you could also use these as small storage containers.
